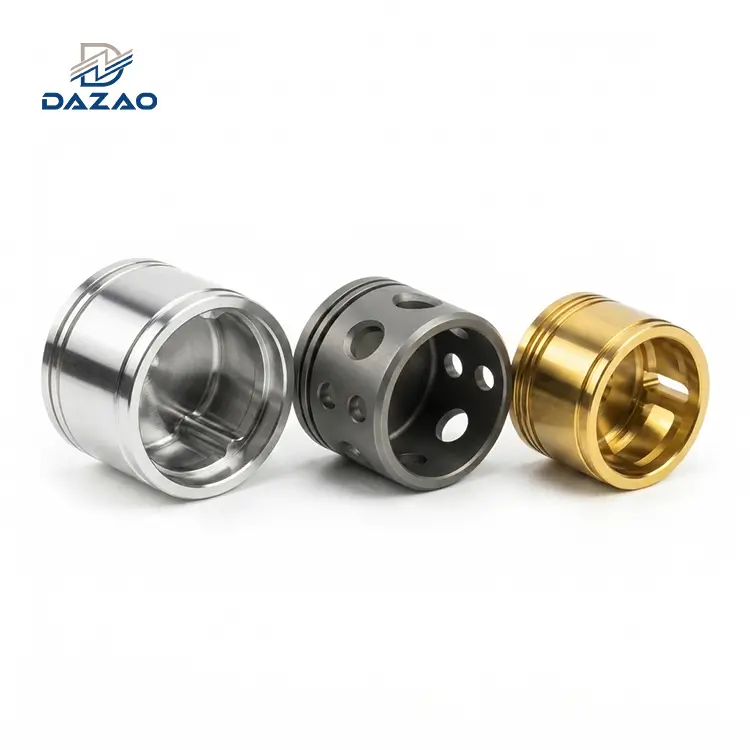

Successful thin wall CNC machining requires shifting from static geometry analysis to dynamic structural management. Standard machining practices fail on thin walls below 1.0 mm due to cantilever beam deflection, dynamic resonance shifts during material removal, and residual stress release. Maintaining thin wall CNC machining tolerances within ±0.025 mm demands synchronized bilateral step-down milling, variable-helix carbide tooling with minimum overhang, and free-state metrology rather than on-fixture verification.

Physical Failure Mechanics in Thin Wall CNC Machining
When wall thickness falls below 1.5 mm, cutting forces easily exceed the structural yield threshold of the unsupported workpiece. Standard roughing and finishing practices developed for prismatic parts fail because they assume a rigid workpiece. In thin wall processing, the workpiece acts as an elastic, vibration-prone diaphragm where cutting resistance directly converts into dimensional deviation.
Scrap Rate Analysis: High-Aspect Aerospace Housing Case Study
At the Dazao Machinery facility, an early production run of 200 aerospace heat-sink enclosures highlighted the non-linear risks of thin wall aluminum machining. While our standard protocols detailed in our complete aluminum CNC machining guide deliver consistent results on heavy structures, this specialized component presented extreme challenges:
· Material: 7075-T6 aluminum
· Wall thickness: 0.8 mm
· Wall height: 45.0 mm (Aspect Ratio: 56.25:1)
· Target tolerance: ±0.030 mm
· Surface finish: Ra 0.8 µm
The initial production strategy utilized standard high-speed contouring with a 10 mm 3-flute carbide end mill running at 12,000 RPM, taking 0.5 mm radial passes per Z-level step down.
The outcome was unacceptable:
1. Mid-wall taper bulge: The top rim measured 0.805 mm, but the center of the wall measured 0.925 mm, exceeding the upper tolerance limit by 0.095 mm due to elastic deflection away from the cutter.
2. Top-edge regenerative chatter: Severe vibration marks developed along the upper 15 mm of the rib profile, driving surface roughness to Ra 3.2 µm.
3. Scrap rate: 100% of the first 12 qualification units were non-conforming.
The failure was not caused by spindle runout or incorrect tool offsets. It was caused by treating a dynamic, flexible cantilever structure as a rigid prismatic block. Mastering how to machine thin walls requires isolating the four root physical mechanisms responsible for structural instability.
The Four Primary Physical Failure Modes
|
Failure Mode |
Physical Root Cause |
Direct Impact on Part |
Corrective Engineering Strategy |
|
Elastic Deflection |
Radial cutting forces exceed section stiffness |
Mid-span wall bulging and dimensional taper |
Low-radial-engagement step-down milling |
|
Regenerative Chatter |
Tool tooth passing frequency matches part resonance |
Surface ripple marks and premature tool chipping |
Variable-helix tooling with unequal tooth pitch |
|
Residual Stress Release |
Bulk core removal unbalances raw material skin stresses |
Post-machining twisting and unconstrained bowing |
Pre-stretched stock (T651) with intermediate resting |
|
Thermal Shock Distortion |
High-pressure coolant creates severe cross-wall delta-T |
Asymmetric curling into the cutter path |
Dual-sided balanced flood or calibrated MQL blast |
Cantilever Deflection and Aspect Ratio Traps
When radial cutting force acts perpendicular to a thin vertical rib, the wall behaves like a vertical cantilever beam fixed at the floor of the pocket. Bending deflection increases directly with cutting force and grows proportionally with the cube of the wall height, while dropping with the cube of the wall thickness.
Consulting standardized CNC wall thickness design guidelines helps clarify this relationship. A wall measuring 0.5 mm in thickness with a height of 5 mm represents an aspect ratio of 10:1 and remains relatively simple to hold. Increasing the height to 35 mm raises the aspect ratio to 70:1, increasing flexibility by hundreds of times and creating extreme vulnerability to cutting pressure.
|
Aspect Ratio (Height to Thickness) |
Manufacturing Risk Profile |
Deflection Multiplier |
Baseline Cost Factor |
Recommended Machining Protocol |
|
Below 10:1 |
Low Risk (Standard Production) |
1.0x (Baseline) |
1.0x |
Standard High-Speed Milling passes |
|
10:1 to 30:1 |
Moderate Risk (Controlled) |
4.5x |
1.8x to 2.5x |
Synchronized bilateral step-down milling |
|
30:1 to 50:1 |
High Risk (Specialized Setup) |
18.0x |
3.0x to 4.5x |
Trochoidal paths with custom soft jaws |
|
Above 50:1 |
Extreme Risk (Critical Deflection) |
45.0x or higher |
5.5x or higher |
Solid phase-change or sacrificial bridge support |
Three Hidden Thin Wall Vulnerabilities Standard Manuals Overlook
Industry handbooks often recommend simple rules like reducing cut depth or sharpening edges. In practical production for thin wall machining aerospace parts, these generic recommendations fail to address complex physical behaviors observed on the shop floor.
The Clamped CMM Inspection Trap: Constrained vs Free-State Verification
A frequent point of friction between machine shops and procurement teams involves components that pass on-machine probing but fail receiving inspection.
When a thin-wall housing is clamped to a fixture plate or held in vice jaws:
· Mechanical clamping forces exert compressive pre-loads that hold warped walls in an artificially flat, constrained orientation.
· Machine-mounted touch probes or on-fixture CMM runs register perfect nominal dimensions conforming to precision aluminum CNC machining tolerances.
· Upon unclamping, internal elastic strain releases immediately, resulting in springback deviations up to 0.150 mm.

At Dazao Machinery, our quality protocol mandates free-state metrology. Thin-wall parts are unbolted, rested on kinematic points for a minimum four-hour thermal and stress equalization period, and measured using non-contact structured-light 3D optical scanning to detect unconstrained bowing.
Dynamic Natural Frequency Shift During Z-Level Pocketing
Standard machining calculations assume the natural frequency of the workpiece remains static throughout the operation. In deep cavity milling, this assumption is incorrect.
As an end mill steps down along a thin vertical wall:
· The uncut raw stock below the cutter acts as a rigid support.
· The milled section above the cutter acts as an increasingly flexible unsupported cantilever.
· With every Z-level step, the local stiffness and the primary natural frequency drop significantly.
A spindle speed of 14,000 RPM that cuts smoothly at a depth of 2.0 mm can trigger violent resonant thin wall machining chatter at a depth of 18.0 mm because the dropping natural frequency of the wall aligns with the tool tooth passing frequency. Stable machining requires dynamic spindle speed adjustments or depth-variable feed optimization to bypass changing resonance zones.
Thermal Shock Bowing from Asymmetric Flood Coolant
In thin wall aluminum machining, excessive flood coolant can cause unexpected dimensional distortion.
Applying high-pressure coolant directly to the cutting zone on one side of a 0.6 mm wall creates an asymmetric thermal condition:
· The tool contact side experiences rapid localized heating followed by instant quenching.
· The opposite dry cavity retains ambient shop temperature.
· This temperature differential generates unequal thermal contraction across the thin cross-section.
The resulting localized stress causes the top section of the rib to bow inward toward the cutter path by 0.030 mm to 0.060 mm during final passes. To eliminate this distortion, Dazao utilizes minimum quantity lubrication (MQL) with high-pressure air blast or dual-sided symmetric coolant delivery to maintain balanced thermal equilibrium.
Advanced Tool Geometry and Toolpath Milling Dynamics
Controlling thin wall machining deflection requires selecting cutter geometries that minimize radial cutting forces while maximizing tool rigidity.
Tool Geometries Engineered for Thin Walls
Tool deflection varies with the third power of the overhang length and the inverse fourth power of the tool core diameter. Minimizing tool overhang is essential. In deep pocket setups, choosing 5-axis CNC machining configurations allows the spindle to articulate toward the feature, eliminating the excessive tool extensions required on conventional 3-axis setups.
Key tooling parameters for thin wall applications include:
· Tool Core Diameter: Utilize stub-length end mills with tapered neck relief. Maintain a length-to-diameter ratio under 2.5:1 wherever cavity clearance allows.
· Variable Helix and Unequal Pitch: End mills with alternating helix angles (such as 38/41 degrees) and variable pitch spacing prevent the formation of uniform harmonic waves along the thin wall edge.
· Rake and Clearance Angles: A highly polished positive rake angle (12 to 18 degrees) reduces cutting friction and shear resistance. Micro-fine grain solid carbide substrates provide sharp edge radii below 5 micrometers to eliminate material plowing.
· Corner Radius Inclusion: Sharp square-corner end mills introduce severe stress risers at the wall base. Designing a transition with a clear internal corner radius cost impact in mind and using a bull-nose cutter with a minimum 0.5 mm or 1.0 mm radius distributes shear stress and increases base rigidity by up to 35%.
|
Tooling Parameter |
Engineered Thin-Wall Specification |
Operational Function |
|
Helix Geometry |
37-degree / 40-degree Variable Helix |
Breaks harmonic chatter frequency synchronization |
|
Flute Configuration |
3 Flutes with mirror-polished flutes |
Maximizes chip evacuation space and reduces friction |
|
Radial Rake Angle |
Positive 14-degree to 16-degree angle |
Minimizes radial cutting forces pushing against the wall |
|
Corner Geometry |
0.5 mm to 1.0 mm Bull-Nose Radius |
Eliminates sharp corner stress concentrations at wall base |
|
Tool Coating |
Uncoated or thin ZrN / DLC Coating |
Prevents built-up edge without rounding cutting edges |
|
Toolholder Interface |
Hydraulic or Heat-Shrink Chucks |
Keeps total indicated runout below 0.003 mm |

Advanced Milling Techniques: Step-Down vs High-Efficiency Milling
Selecting the proper thin wall milling techniques depends on the structural ratio of the wall and the cavity depth.
A. Synchronized Step-Down Milling (Staircase Method)
Never machine one side of a deep thin wall to final depth before cutting the opposite side. This leaves the final finishing pass unsupported against an empty cavity.
Instead, use synchronized bilateral step-down milling:
1. Machine Pocket A to a depth of 3.0 mm.
2. Machine Pocket B on the opposite side to 3.0 mm.
3. Finish the left wall skin at depth 3.0 mm.
4. Finish the right wall skin at depth 3.0 mm.
5. Step down to the next vertical level.
This ensures the section currently being cut is always supported by the solid, unmachined core directly beneath it.
B. High-Speed Trochoidal Toolpaths and Constant Tool Engagement
Traditional linear pocketing toolpaths spike cutting forces whenever the tool enters a 90-degree corner, causing rapid deflection and chatter. Implementing advanced high-speed machining aluminum strategies with trochoidal toolpaths maintains a constant tool engagement angle (between 30 and 45 degrees) with low radial stepover (5% to 10% of tool diameter) and high axial depth of cut. This replaces intermittent shock loads with smooth, continuous, low-force cuts that prevent thin-wall damage.
|
Milling Parameter |
Conventional Pocketing Strategy |
High-Speed Trochoidal Milling |
|
Radial Depth of Cut |
50% to 75% of tool diameter |
5% to 10% of tool diameter |
|
Axial Depth of Cut |
0.5x to 1.0x tool diameter |
2.0x to 3.0x tool diameter |
|
Cutting Force Direction |
High radial load perpendicular to wall |
Low, steady, predictable cutting force vector |
|
Corner Tool Engagement |
Spikes up to 180 degrees in sharp corners |
Constant controlled 40-degree engagement angle |
|
Structural Deflection Risk |
Severe mid-span bulging and taper |
Minimal geometric deviation |
Dedicated Workholding and Physical Support Systems
Standard machine shop vises generate concentrated linear clamping loads that easily crush or permanently distort thin wall geometries before the cutting tool touches the raw stock. In precision thin wall machining workholding, the primary objective is converting point-load and edge-load forces into uniform, low-pressure surface contact across the entire part envelope.
The Failure of Mechanical Vises on Flexible Walls
When a standard vise clamps an open-cavity housing, opposing forces push sidewalls inward elastically. If a machinist finishes the wall profile while the vise is tightened, the wall springs outward the moment the vise handle is released. This results in an hourglass or barrel-shaped profile error that cannot be corrected by toolpath offsets.
Uniform Contact Solutions: Vacuum Tables and 3D Contoured Soft Jaws
To eliminate localized pre-strain, Dazao implements distributed hold-down systems:
· Custom 3D Contoured Soft Jaws: Aluminum 6061 soft jaws machined with the negative profile of the pre-machined part. These jaws fully support external rib structures, distributing clamping force across the entire external surface area rather than two contact lines.
· Segmented Vacuum Fixturing: Dedicated aluminum vacuum plates with Viton O-ring perimeter seals. Vacuum workholding applies a uniform downward pressure of up to 1 bar across large floor areas, stabilizing thin base webs without inducing vertical edge deflection.
· Pneumatic Diaphragm Clamping: Micro-clamping systems with programmable pneumatic regulators that maintain continuous, monitored low-force holding pressure between 50 N and 150 N.

Phase-Change and Fluid Media Support
For extreme height-to-thickness ratios (Aspect Ratio > 40:1), external clamping alone cannot prevent mid-span vibration. When manufacturing deep cavities that follow strict deep pocket CNC design rules, internal temporary solid support becomes necessary.
· Low-Melting-Point Alloys: Bismuth-based alloys (melting point between 70°C and 95°C) poured into internal pockets. Once solidified, the alloy provides a rigid backing directly against the thin wall, eliminating chatter and flexing during final external finishing passes. The alloy is subsequently evacuated in a hot-water wash tank without altering the heat-treatment state of the aluminum.
· Water-Soluble Rigid Polymers and Machining Waxes: Applied for parts with complex internal channels where metal alloys cannot be cleanly evacuated. The solid wax supports thin walls during high-speed milling and dissolves completely in warm aqueous wash cycles.
Dazao Proprietary Method: Sacrificial Structural Ribs and Micro-Tabs
When manufacturing deep thin-wall boxes, Dazao engineers integrate temporary stiffening bridges directly into the CAM roughing strategy:
1. During pocket roughing, temporary 1.2 mm thick cross-ribs are left connecting opposing long thin walls every 30 mm.
2. These sacrificial ribs keep the local natural frequency high and prevent acoustic resonance during side-wall finishing.
3. In the final operation, a miniature 3 mm solid carbide end mill removes the cross-ribs using high-speed, light axial passes, followed by local floor blending.
|
Fixturing Method |
Optimum Part Geometry |
Structural Setup Rigidity |
Tooling & Cycle Overhead |
|
Vacuum Chucking |
Flat plates, wide pocket floors |
High normal bed holding |
Low setup cost, rapid cycle |
|
Contoured Soft Jaws |
Formed thin-wall housings |
High perimeter support |
Moderate custom tooling cost |
|
Phase-Change Wax / Alloy |
Deep tall vertical fins |
Maximum internal rigidity |
High processing wash time |
|
Sacrificial Bridges |
Large open aerospace frames |
High structural stability |
Low CAM programming cost |
Aluminum Alloy Metallurgy and Residual Stress Balancing
The alloy selection and internal metallurgical state dictate how much a thin wall will move during and after cutting.
Metallurgy: 6061-T651 vs 7075-T6 Behavior
· Alloy 6061-T651 (Stress-Relieved by Stretching): The T651 temper designates that the mill mechanically stretched the plate by 1.5% to 3.0% after solution heat treatment. This stretching neutralizes internal quenching stresses. It is the most dimensionally stable standard grade for thin aluminum milling.
· Alloy 7075-T6 (High-Strength Aircraft Zinc Alloy): While offering a tensile strength of 572 MPa compared to 310 MPa for 6061, 7075-T6 retains significant internal quenching gradients. When deep pockets are milled asymmetrically, the uneven release of internal stress causes thin walls to bow immediately.
· Grain Direction Alignment: Material stiffness and stress release vary along the rolling grain (longitudinal direction) versus across the grain (transverse direction). Thin walls aligned parallel to the rolling grain exhibit higher risk of long-span bowing.
Multi-Stage Stress Relief Protocols
To produce aerospace components with stable tolerances within ±0.025 mm, Dazao enforces a strict four-stage thermal and mechanical processing sequence:
1. Stage 1 (Roughing): Remove 80% to 85% of total pocket volume, leaving a uniform 1.0 mm skin on all thin walls and floor sections.
2. Stage 2 (Thermal Stabilization): Subject parts to controlled sub-critical thermal cycles (for 6061: soak at 160°C to 180°C for four hours, followed by controlled air cooling) or ultrasonic vibratory stress relief to balance internal grain tension.
3. Stage 3 (Relaxation and Re-Fixturing): Fully unclamp the part from primary tooling. Allow the component to rest in ambient cleanroom conditions for four hours to complete initial elastic warp.
4. Stage 4 (Semi-Finishing): Re-clamp on precision datum locations using low holding force. Machine down to a remaining stock allowance of 0.15 mm.
5. Stage 5 (Final Spring Pass Finishing): Execute high-speed passes at 15,000+ RPM using sharp, polished carbide tools taking minimal radial depth of cut (0.05 mm), eliminating cutting-force deflection entirely.
|
Material Grade |
Yield Strength |
Internal Residual Stress Level |
Recommended Machining Protocol |
|
Al 6061-T651 |
276 MPa |
Low (Mill Stretched) |
Standard two-stage roughing and finishing |
|
Al 7075-T651 |
503 MPa |
Moderate |
Three-stage sequence with relaxation resting |
|
Al 7075-T6 |
503 MPa |
High (Unstretched) |
Full thermal stress-relief cycle mandatory |
|
Ti-6Al-4V Grade 5 |
880 MPa |
High (Low Thermal Conductivity) |
Micro step-down milling with targeted MQL |
|
Stainless Steel 316L |
290 MPa |
Severe (Work-Hardening Tendency) |
Rigid tooling setup with positive rake cutters |
Thin Wall DFM Rules and Procurement Cost Matrix
Purchasing and engineering teams often balance lightweight goals against manufacturing cost. Wall thickness specifications directly dictate machine cycle times, tooling investments, and scrap risk.
The Aspect Ratio Cost Escalation Model
The ratio between wall height and wall thickness is the single most reliable predictor of manufacturing complexity.
· Safe Zone (Aspect Ratio < 10:1): Standard high-speed machining strategies apply. Low scrap risk. Standard inspection protocols. Relative cost baseline: 1.0x.
· Challenge Zone (Aspect Ratio 10:1 to 30:1): Requires stepped Z-level cutting passes, balanced bilateral toolpaths, and custom soft jaws. Machine cycle times increase by 80% to 150%. Relative cost baseline: 1.8x to 2.5x.
· High-Risk Zone (Aspect Ratio 30:1 to 50:1): Requires specialized variable-helix tooling, stress-relief heat treatment between operations, and reduced feed rates. Cycle times increase significantly. Relative cost baseline: 3.0x to 4.5x.
· Extreme Risk Zone (Aspect Ratio > 50:1): Requires temporary phase-change fill media or sacrificial bridge structures. High CMM and optical inspection overhead. Relative cost baseline: 5.5x or higher.
DFM Checklist for Thin-Wall Engineering Drawings
1. Incorporate Internal Corner Blend Radii: Never design sharp 90-degree corners at the intersection where a thin wall meets a pocket floor. A corner fillet with a radius equal to or greater than the wall thickness reduces stress concentration by up to 60% and provides structural reinforcement against bending forces.
2. Design a Tapered Cross-Section (Draft Angle): When functional clearances permit, add a 0.5-degree to 1.5-degree draft angle to the wall. A tapered wall that is thicker at the root base and thinner at the top rim increases section modulus and stiffness dramatically compared to a straight vertical profile.
3. Add Stiffening Ribs and Perimeter Flanges: Rather than specifying a uniform 1.5 mm wall across an entire large enclosure, engineers can utilize proven weight reduction pockets and ribs to reduce the general wall skin to 0.8 mm while adding intersecting 1.5 mm cross-ribs or a reinforced perimeter lip. This lowers total component weight while raising the structural natural frequency.
4. Specify Explicit Metrology State: Clearly state on drawing title blocks whether geometric tolerances apply in the free state (using the Free State symbol, Circle F) or when restrained on functional assembly datums.
|
Feature Geometry |
Minimum Practical Baseline |
Preferred High-Yield DFM Specification |
|
Minimum Wall Thickness (Aluminum) |
0.50 mm |
0.80 mm to 1.20 mm |
|
Minimum Wall Thickness (Titanium) |
0.35 mm |
0.50 mm to 0.75 mm |
|
Floor Fillet Radius |
Equal to wall thickness |
1.5x to 2.0x wall thickness |
|
Wall Draft Angle |
0.0 degrees (Straight Vertical) |
0.5 degrees to 1.0 degrees Tapered Profile |
|
Aspect Ratio Target |
Maximum 30:1 |
Maintained under 15:1 |

Strategic Procurement and Manufacturing Next Steps
Managing thin wall machining requires an integrated engineering workflow that pairs toolpath dynamics and workholding design with practical metallurgy. Specifying tight tolerances without reviewing the component aspect ratio, corner radii, and free-state stress behavior leads to unpredictable cycle times, tooling wear, and scrap rates.
Reviewing your part geometry against our production-ready CNC DFM checklist before finalizing production drawings ensures high yield and predictable lead times.
At Xiamen Dazao Machinery, our engineering group reviews CAD models at the quoting stage, running automated DFM cross-checks to identify deflection risks, optimize aspect ratios, and design custom fixturing strategies before spindle startup. When your project demands tight geometric control on challenging components, our custom precision CNC milling services provide the verified process reliability your supply chain requires.

FAQs
01.Why do thin aluminum parts cup or bow immediately after vice pressure is released?
02.How do machinists eliminate resonant chatter on tall ribs without lowering spindle RPM?
03.How does climb milling compare to conventional milling when finishing thin sidewalls?
04.What causes a thin wall to measure thicker in the middle than at the top and bottom?
05.When should drawings specify free-state inspection for thin-walled parts?
06.How can machine shops clean low-melting-point support alloys out of complex pockets?