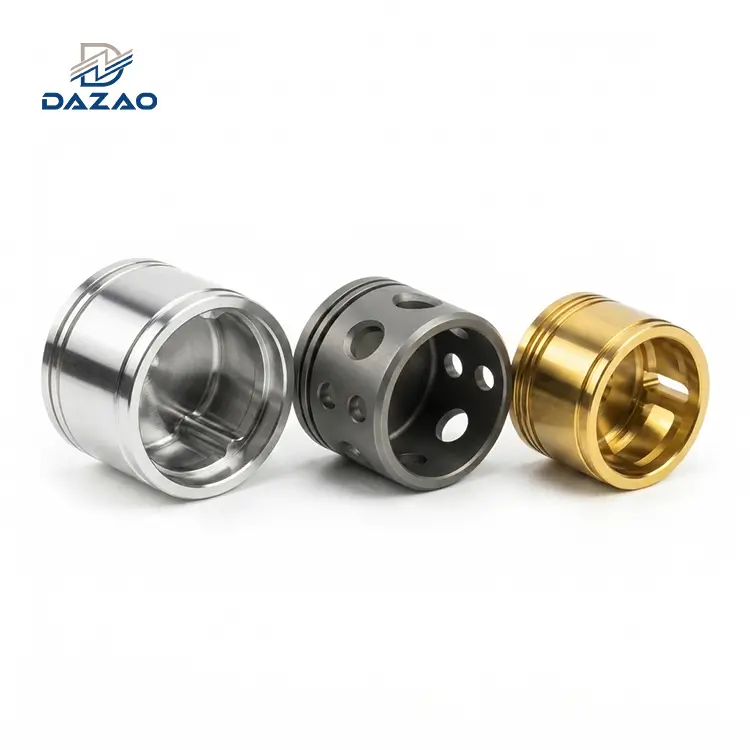

Precision manufacturing often presents a gap between digital CAD models and the physical reality of the machine shop floor. While aluminum alloys are highly machinable, high-volume production or tight-tolerance projects frequently encounter costly challenges such as part warping, dimensional drift, tool sticking, and surface finish inconsistencies.
For procurement officers, project managers, and mechanical engineers in the automotive, robotics, medical, and aerospace sectors, managing these manufacturing variables is critical to controlling costs and ensuring assembly alignment. This technical guide leverages over twenty years of machining data from Xiamen Dazao Machinery to analyze the metallurgical, geometric, and process variables of aluminum CNC machining to help you optimize your production outcomes.

Selecting the Right Aluminum Alloys: Mechanical Properties and Residual Stress Risks
Selecting the correct alloy grade requires balancing functional mechanical performance against shop-floor machinability. Choosing an overly complex or hard alloy can increase cycle times and tool wear, while selecting a grade with poor structural stability can lead to unexpected part deformation.
Comparing 6061-T6 and 7075-T6 for Structural Custom CNC Aluminum Parts
The mechanical performance of a machined part is directly related to its alloy composition and temper state. Selecting the wrong grade can lead to premature structural failure, excessive tool wear, or poor surface finish quality.
6061-T6 aluminum CNC machining
This silicon-magnesium alloy is the standard for general structural engineering. The T6 temper indicates it has been solution heat-treated and artificially aged to precipitate magnesium silicide [Mg2Si] phases uniformly throughout the aluminum matrix.
· Machining Characteristics: It exhibits a machinability rating of approximately 50 percent compared to free-cutting brass. It produces continuous, ductile chips that require active chipbreaking.
· Surface Finishing: It is highly receptive to decorative sulfuric acid anodizing, showing excellent color uniformity.
· Limitations: Its lower shear strength makes direct-tapped threads vulnerable to stripping under high torque.
7075 aluminum machining guide
This zinc-alloy grade is stabilized with magnesium and copper, creating a dense dispersion of magnesium zinc [MgZn2] precipitates.
· Machining Characteristics: It provides a yield strength of 503 MPa, which is comparable to structural steels. The material is harder and less ductile than 6061-T6, leading to higher cutting forces and increased tool wear, but it produces cleaner, more brittle chips that are easier to evacuate. High-precision geometries are often achieved on our 5-axis CNC milling equipment to minimize setup errors on this tough grade.
· Surface Finishing: Due to the higher copper content [up to 2.0 percent], it is highly susceptible to galvanic corrosion and shows a darker, yellowish tint after clear anodizing.
· Machining 6061 vs 7075 aluminum: Use 6061-T6 for cost-sensitive structural parts, fluid manifolds, and aesthetic brackets. Select 7075-T6 for high-load structural joints, aerospace fittings, and high-stress robotic arms.
Aircraft grade aluminum CNC
Beyond 7075, aerospace applications utilize specialized alloys such as 2024-T3 and 7050-T7451.
· 2024-T3: High copper content [up to 4.9 percent] provides excellent fatigue resistance, but the alloy cannot be welded and is prone to micro-cracking if subjected to rapid, dry machining.
· 7050-T7451: This alloy is specifically treated to resist stress-corrosion cracking while maintaining high strength, making it ideal for thick structural bulkheads.
|
Metallurgical and Mechanical Property |
Al6061-T6 |
Al7075-T6 |
Al2024-T3 |
Al5052-H32 |
Al6082-T6 |
|
Silicon [Si] Percent |
0.40 to 0.80 |
Max 0.40 |
Max 0.50 |
Max 0.25 |
0.70 to 1.30 |
|
Iron [Fe] Percent |
Max 0.70 |
Max 0.50 |
Max 0.50 |
Max 0.40 |
Max 0.50 |
|
Copper [Cu] Percent |
0.15 to 0.40 |
1.20 to 2.00 |
3.80 to 4.90 |
Max 0.10 |
Max 0.10 |
|
Magnesium [Mg] Percent |
0.80 to 1.20 |
2.10 to 2.90 |
1.20 to 1.80 |
2.20 to 2.80 |
0.60 to 1.20 |
|
Chromium [Cr] Percent |
0.04 to 0.35 |
0.18 to 0.28 |
Max 0.10 |
0.15 to 0.35 |
Max 0.25 |
|
Zinc [Zn] Percent |
Max 0.25 |
5.10 to 6.10 |
Max 0.25 |
Max 0.10 |
Max 0.20 |
|
Yield Strength [MPa] |
276 |
503 |
345 |
193 |
260 |
|
Tensile Strength [MPa] |
310 |
572 |
483 |
228 |
310 |
|
Brinell Hardness [HB] |
95 |
150 |
120 |
60 |
95 |
|
Thermal Conductivity [W/m-K] |
167 |
130 |
121 |
138 |
170 |
|
Machinability Rating [Percentage] |
50 |
70 |
75 |
30 |
50 |
|
Material Cost Factor |
1.0 [Base] |
1.8 to 2.2 |
2.0 to 2.4 |
0.95 |
1.15 |
Managing Residual Stress Warping in Aircraft Grade Aluminum CNC Plates
A common challenge in precision manufacturing is when flat, asymmetrical plates warp immediately after being released from the CNC fixture. This deformation is not caused by clamping force or tool pressure; instead, it is driven by residual stresses locked inside the raw aluminum stock during the mill extrusion and rolling processes.
During rolling and extrusion, the material exterior cools faster than the interior core. This temperature gradient, combined with plastic deformation, locks in high residual stress fields: compressive stresses on the outer boundaries and tensile stresses in the center.
When a CNC mill cuts deep cavities on one side of a raw plate, it removes the compressive stress layer on that face. The tensile stresses in the core are no longer balanced, forcing the plate to bow to establish a new physical equilibrium.

Dazao Case Study: Aerospace Optical Instrument Support Plate
An aerospace client contracted Xiamen Dazao Machinery to manufacture an optical instrument support plate measuring 480mm by 320mm by 15mm. The part featured a series of asymmetrical pockets on the top face that removed 75 percent of the material volume, leaving a base plate thickness of only 3.0mm. The design required a flatness tolerance of 0.05mm across the diagonal.
The initial production attempt using standard extruded 6061-T6 flat stock resulted in a disaster. After releasing the parts from the vacuum fixture, every single plate bowed upward. Measurement at 12 coordinate locations using our CMM revealed a maximum deflection of 1.68mm.
The Root Cause Analysis [RCA]
The intense material removal on the top face released the compressive surface stresses on that side. The remaining raw material on the bottom face contracted, pulling the edges of the plate upward.
The Dazao Corrective Action and Manufacturing Protocol
1. Material Sourcing Control: We banned the use of standard extruded plate and transitioned to Al6061-T651 stress-relieved plate. The T651 temper means the mill mechanically stretched the alloy by 1.5 to 3 percent after solution heat treatment, neutralizing the internal residual stresses.
2. Roughing Pass Optimization: We modified the CNC programming to perform roughing cuts on both sides of the plate. Instead of milling the top pockets to final depth in a single setup, we machined the bottom face first by 2.0mm, flipped the part to rough the top pockets, and left a uniform 0.5mm finishing allowance on all surfaces.
3. Intermediate Thermal Relief: We removed the semi-finished parts from the machine and subjected them to a thermal stress-relief cycle in our controlled oven at 175 degrees Celsius for 4 hours, followed by slow air cooling.
4. Finish Milling Strategy: The parts were returned to the CNC mill and held lightly in a custom vacuum fixture to avoid mechanical distortion during the final 0.5mm finishing passes.
5. Final Verification: The CMM measurement of the new batch recorded a maximum diagonal deflection of only 0.024mm, safely below the 0.05mm limit.
High-Speed Milling and Turning: Eliminating Tool Adhesion and Controlling Chip Flow
High-speed machining of aluminum requires an understanding of the thermodynamics and mechanics that occur at the interface between the cutting edge and the workpiece.

How to Machine Aluminum Without Sticking by Optimizing Tool Coatings
The low melting point of aluminum, combined with its high ductility, makes it susceptible to adhesive wear during machining. Under the high pressures and temperatures generated at the tool-workpiece interface, the aluminum can weld itself to the cutting edge, forming a Built-Up Edge [BUE].
· The Chemical Affinity of Cobalt: Standard tungsten carbide tools utilize cobalt as a binder. Aluminum has a strong chemical affinity for cobalt, which promotes chemical bonding between the aluminum chip and the tool flute under high heat.
· The Physics of Chip Adhesion: Once a microscopic layer of aluminum adheres to the flute, subsequent chips pile up behind it. This blocks chip evacuation, increases friction, raises the cutting temperature beyond 450 degrees Celsius, and eventually causes tool breakage.
· Selecting the Best end mill for aluminum CNC:
· Uncoated Micro-grain Carbide: Uncoated tools can achieve extremely sharp cutting edges [radius under 5 microns], which is necessary to slice through ductile aluminum rather than plowing it.
· Zirconium Nitride [ZrN] Coatings: ZrN coatings offer high thermal stability and help resist chemical adhesion.
· Diamond-Like Carbon [DLC] Coatings: This represents the premium choice for high-volume aluminum runs. A DLC coating provides a hardness close to natural diamond and an extremely low coefficient of friction [under 0.1], preventing aluminum chips from sticking to the flute faces.

Optimized Tool Geometries
· Helix Angle: Use a 37-degree helix angle for general slotting to balance axial lifting force and chip evacuation. Use a 45-degree helix angle for peripheral finishing to achieve a smooth surface finish.
· Flute Count: Use 2-flute or 3-flute end mills instead of 4-flute options. The larger chip valleys of 2-flute and 3-flute tools provide the clearance necessary to evacuate large, ductile aluminum chips during high-feed operations.
· Rake Angle: Specify a high positive rake angle [15 to 20 degrees] to reduce shear force and cutting temperature.
Calculating Speeds and Feeds for High-Efficiency CNC Milling Aluminum
Achieving high metal removal rates without causing tool deflection or sticking requires precise speed and feed calculations. Below are the formulas used by our programming department:
1. Spindle Speed [N, RPM]
N=(Vc×1000)/(π×Dc)
2. Feed Rate [Vf, mm/min]
Vf=N×z×fz
3. Material Removal Rate [MRR, cm³/min]
MRR=(Ap×Ae×Vf)/1000
Where:
Vc = Cutting Speed [meters per minute]
Dc = Cutter Diameter [millimeters]
z = Number of Flutes
fz = Feed per Tooth [chip load, millimeters per tooth]
Ap = Axial Depth of Cut [millimeters]
Ae = Radial Depth of Cut [millimeters]
For a standard 12mm diameter, 3-flute DLC-coated carbide end mill roughing Al6061-T6 on a 15,000 RPM spindle, the calculated parameters are:
Vc = 450 m/min
N = [450 x 1000] / [3.1416 x 12] = 11,936 RPM
fz = 0.08 mm/tooth
Vf = 11,936 x 3 x 0.08 = 2,865 mm/min
If we set Ap to 18mm [1.5 x Dc] and Ae to 1.2mm [0.1 x Dc] using a high-efficiency milling [HEM] toolpath, the Material Removal Rate is:
MRR=(18×1.2×2865)/1000=61.88 cm3/min
This parameter set balances high metal removal rates with low radial tool deflection.
Managing Chip Evacuation in High-Speed CNC Turning Aluminum Processes
During CNC turning aluminum operations, continuous chip formation can wrap around the chuck or workpiece, scratching critical aesthetic surfaces and increasing cycle times. To maintain clean results, our turning setups utilize specialized inserts with sharp rake geometries and aggressive ground chipbreakers that force continuous aluminum strands to snap into short, manageable chips.
Furthermore, correct management of the CNC aluminum cutting depth is necessary during turning. Too shallow of a cut prevents the chipbreaker from engaging, while too deep of a cut overloads the machine spindle and causes part deflection.
|
Tool Diameter [Dc] |
Process Type |
Alloy |
Spindle Speed [N] |
Feed Rate [Vf] |
Axial Depth [Ap] |
Radial Depth [Ae] |
Coolant Type |
|
3.0 mm [3-Flute] |
Roughing |
6061-T6 |
15,000 RPM |
1,350 mm/min |
3.0 mm |
0.30 mm |
Flood Coolant |
|
3.0 mm [3-Flute] |
Finishing |
6061-T6 |
15,000 RPM |
900 mm/min |
3.0 mm |
0.05 mm |
Mist Lubrication |
|
6.0 mm [3-Flute] |
Roughing |
6061-T6 |
15,000 RPM |
2,250 mm/min |
9.0 mm |
0.60 mm |
Flood Coolant |
|
6.0 mm [3-Flute] |
Finishing |
6061-T6 |
15,000 RPM |
1,500 mm/min |
9.0 mm |
0.10 mm |
Mist Lubrication |
|
10.0 mm [3-Flute] |
Roughing |
6061-T6 |
12,000 RPM |
2,880 mm/min |
15.0 mm |
1.00 mm |
Flood Coolant |
|
10.0 mm [3-Flute] |
Finishing |
6061-T6 |
14,000 RPM |
2,100 mm/min |
15.0 mm |
0.15 mm |
Mist Lubrication |
|
12.0 mm [3-Flute] |
Roughing |
6061-T6 |
11,000 RPM |
2,970 mm/min |
18.0 mm |
1.20 mm |
Flood Coolant |
|
12.0 mm [3-Flute] |
Finishing |
6061-T6 |
12,000 RPM |
2,160 mm/min |
18.0 mm |
0.20 mm |
Mist Lubrication |
|
16.0 mm [3-Flute] |
Roughing |
7075-T6 |
8,500 RPM |
2,295 mm/min |
24.0 mm |
1.60 mm |
Flood Coolant |
|
16.0 mm [3-Flute] |
Finishing |
7075-T6 |
10,000 RPM |
1,800 mm/min |
24.0 mm |
0.25 mm |
Flood Coolant |
|
20.0 mm [3-Flute] |
Roughing |
7075-T6 |
6,500 RPM |
1,950 mm/min |
30.0 mm |
2.00 mm |
Flood Coolant |
|
20.0 mm [3-Flute] |
Finishing |
7075-T6 |
8,000 RPM |
1,680 mm/min |
30.0 mm |
0.30 mm |
Flood Coolant |
Design for Manufacturing Principles: Balancing Tolerances and Wall Thickness
Design choices have a direct impact on cycle times and manufacturing costs. Specifying unmachinable geometries or unnecessarily tight tolerances can quickly drive up production expenses.
Optimizing Corner Radii and Pocket Depths for Lower Machine Cycle Times
· Internal Corner Fillets: Never design sharp 90-degree internal vertical corners on your parts. CNC milling machines use rotating round tools, which cannot cut sharp internal corners. If an internal corner requires a 5mm radius, avoid specifying exactly a 5mm radius in your drawing. Doing so forces the tool to stop and pivot, which causes tool chatter, surface defects, and high tool wear. Instead, design the internal corner radius to be 5.5mm or 6mm. This allows a 10mm end mill to sweep through the corner smoothly without slowing down.
· Deep Cavity Limits: Limit the depth of internal pockets to four times the tool diameter [4 x Dc]. Deep cavities require long, extended-reach end mills, which are prone to deflection, vibration, and poor chip evacuation. If a pocket must be deep, design wide internal corner radii to allow the use of larger-diameter, stiffer cutters.

Determining the Minimum Wall Thickness for CNC Aluminum Structural Integrity
Thin structural walls are popular in lightweight designs, but they present significant challenges on the shop floor. During machining, the lateral forces exerted by the cutting edge can deflect the wall, causing vibration, dimensional errors, and surface defects.
We can analyze this deflection using the classic Euler-Bernoulli cantilever beam model:
y=(F⋅L³)/(3⋅E⋅I)
Where:
y = Wall deflection [millimeters]
F = Radial cutting force [Newtons]
L = Wall height [millimeters]
E = Young Modulus of the material [for 6061-T6, E ≈ 68.9 GPa]
I = Area Moment of Inertia of the wall cross-section [I=(w⋅t³)/12]
w = Length of the wall segment [millimeters]
t = Wall thickness [millimeters]
By substituting the moment of inertia into the deflection formula:
y=(4⋅F⋅L³)/(E⋅w⋅t³)
This equation shows that wall deflection is inversely proportional to the cube of the thickness [t³] and directly proportional to the cube of the height [L³].
· If you reduce the wall thickness from 1.5mm to 0.5mm while keeping the height constant, the deflection increases by a factor of 27.
· If you double the wall height while keeping the thickness constant, the deflection increases by a factor of 8.
Minimum Wall Thickness for CNC Aluminum
To prevent vibration and dimensional errors, follow these empirical height-to-thickness ratio limits:
· For wall heights under 10mm, maintain a minimum wall thickness for CNC aluminum of 0.8mm.
· For wall heights between 10mm and 25mm, maintain a minimum wall thickness of 1.2mm.
· For wall heights between 25mm and 50mm, maintain a minimum wall thickness of 2.0mm.
· If a design absolutely requires thinner walls, the manufacturing team must use expensive step-milling techniques, support fixtures, or custom tooling, which will increase production costs.
Preventing Thread Stripping in Tapped Holes of Soft Aluminum Alloys
A common issue with threaded holes in soft 6061-T6 aluminum is that the threads can easily strip under high torque loads or during repeated assembly and disassembly.
Engineers often attempt to solve this by specifying deeper threaded holes. However, because the first three threads of a fastener carry over 70 percent of the axial load, increasing the thread depth beyond twice the diameter does not significantly improve pull-out strength.
Thread Shear Area Calculation
To prevent thread stripping, we must ensure the shear area of the internal aluminum threads is sufficient to withstand the tensile load of the steel bolt at its yield point.
The shear area of the internal thread per unit length [Asi , mm²/mm] is calculated as:
Asi=π×n×Dmin×[(1/2n)+(1/√3)(Dmin−d2)]
Where:
· n = Threads per millimeter [1/pitch]
· D_min = Minimum major diameter of internal thread [millimeters]
· d_2 = Basic pitch diameter of external thread [millimeters]
Using an M6 x 1.0 bolt in a 6061-T6 aluminum block, the internal thread shear strength is approximately 180 MPa. If the bolt is tightened to its standard proof load, direct-tapped aluminum threads can easily fail.

Dazao Case Study: Industrial Robot Arm Joint Housing
A robotics developer designed an articulated arm joint housing made of 6061-T6. The housing utilized eight M5 fasteners to clamp a high-speed planetary gearbox. During operational testing, the joint experienced high dynamic reversing loads, which caused the direct-tapped M5 threads in the 6061-T6 housing to strip, resulting in prototype failure.
The client initially proposed increasing the thread depth from 10mm to 18mm. Our engineering team conducted a shear area and load distribution analysis, which showed that increasing the depth would not prevent stripping because the load remained concentrated on the first three threads.
The Dazao Solution and Redesign Protocol
We recommended incorporating stainless steel wire thread inserts [such as Heli-Coil] into the design.
1. Thread Preparation: We modified the CNC programming to use a 5.2mm STI [Screw Thread Insert] tap drill instead of the standard 4.2mm drill, and tapped the holes using a specialized M5 STI tap. To secure complex multi-component projects, our clients often rely on our custom assembly services to handle precision hardware installations.
2. Assembly Installation: We installed 1.5D length stainless steel wire thread inserts into the tapped holes, which increased the effective shear diameter of the internal thread and distributed the axial load more evenly.
3. Testing Results: In pull-out testing, the Heli-Coil reinforced assembly resisted tensile forces up to the yield point of the Class 12.9 high-tensile steel bolt, resolving the thread failure issue.
Surface Finishing Protocols: Ensuring Aesthetics and Dimensional Integrity
For many custom aluminum components, the surface finish is a critical functional and aesthetic requirement. Post-machining treatments must be carefully managed to ensure they do not compromise the dimensional accuracy of the parts.

Selecting the Best Bead Blasted Aluminum CNC Finish for Surface Uniformity
Before parts undergo chemical treatment, they are often bead blasted to remove tool marks and create a uniform matte finish.
· Bead blasted aluminum CNC finish: This process uses compressed air to spray glass or ceramic beads at the part, smoothing out tool marks and creating a uniform matte texture.
· Glass Bead #80 [Coarse]: Best for removing heavy machining marks and creating a highly textured, slip-resistant surface. This can reduce the thickness of external features by up to 5 microns.
· Glass Bead #120 to #150 [Medium]: The standard for clean, semi-matte decorative parts. It provides an excellent balance of surface uniformness and minimal dimensional impact.
· Ceramic Bead #220 [Fine]: Recommended for precision medical instrument housings. It produces a smooth satin finish with negligible dimensional change.
|
Media Type |
Grit Size |
Air Pressure [Bar] |
Resulting Roughness [Ra, µm] |
Primary Application |
Dimensional Impact |
|
Glass Bead |
#80 |
4.5 to 5.5 |
1.6 to 3.2 |
Industrial brackets, hidden plates |
Loss of ~5.0 µm |
|
Glass Bead |
#120 |
3.5 to 4.5 |
0.8 to 1.6 |
Standard enclosure panels |
Loss of ~2.5 µm |
|
Glass Bead |
#150 |
3.0 to 4.0 |
0.6 to 1.2 |
Consumer electronics housings |
Loss of ~1.5 µm |
|
Ceramic Bead |
#220 |
2.5 to 3.5 |
0.4 to 0.8 |
Medical and laboratory instruments |
Loss of <1.0 µm |
|
Alum. Oxide |
#120 |
4.0 to 5.0 |
2.0 to 4.0 |
Non-reflective functional surfaces |
Loss of ~8.0 µm |
Calculating Pre-Anodize Tolerance Offsets for Anodized CNC Aluminum Parts
· Anodized CNC aluminum parts: Anodizing electrically grows an aluminum oxide layer on the surface of the part, providing improved wear resistance, corrosion protection, and color options.
· Type II [Decorative Anodizing]: Typically produces an oxide layer between 5 and 15 microns thick. It is highly receptive to organic dyes, making it popular for color-coded industrial parts and consumer goods.
· Type III [Hardcoat Anodizing]: Performed in a low-temperature bath [0 to 5 degrees Celsius] with higher current density, producing a dense oxide layer between 25 and 50+ microns thick. This process provides extreme wear resistance, with a surface hardness up to 450 HV.

Pre-Anodize Chemical Etching and Dimensional Offsets
A frequent issue in precision manufacturing is when parts with tight tolerances fail inspection after undergoing anodizing, despite being within specification immediately after machining.
Before anodizing can occur, parts undergo a chemical cleaning and etching process to remove natural oxides and contaminants. This etching stage typically removes 5 to 15 microns of aluminum per surface.
Furthermore, the subsequent anodizing process grows an oxide layer that is 50 percent penetration [inward growth] and 50 percent build-up [outward growth].
For a Type II anodizing process targeted at a 10-micron total coating thickness:
· The chemical etching removes 5 microns of raw aluminum.
· The anodizing builds up 5 microns of oxide above the original surface.
· The net dimensional change is zero, but the actual raw aluminum boundary has shifted.
For a Type III Hardcoat process targeted at a 50-micron total coating thickness:
· The chemical etching removes 10 microns of raw aluminum.
· The anodizing builds up 25 microns of oxide above the original surface.
· The net dimensional change is a 15-micron increase per surface [or a 30-micron decrease in hole diameters].
Dazao Pre-Compensation Protocol
To ensure perfect fitment of critical dimensions, such as an H7 bearing bore [tolerance: +0.015 / +0.000 mm] receiving a Type III hardcoat, we utilize a pre-compensation protocol:
1. Pre-Calculated Offsets: We program the CNC machines to cut the bore oversize to compensate for the outward growth of the hardcoat anodizing layer.
2. Trial-Run Validation: Before running a full production batch, we process a pilot batch of three parts through the exact CNC toolpaths and surface treatment line to verify the final post-anodizing dimensions.
3. Adjusted CNC Tooling Offsets: Based on the trial results, we make micro-adjustments to the CNC tooling offsets to ensure the entire production run meets the specified final tolerances.
Sourcing Strategy: Vetting High-Quality Aluminum Machining Services
Choosing the right manufacturing partner is critical to ensuring consistent quality and avoiding supply chain disruptions.
Quality Control Metrics for Manufacturing Precision Custom CNC Aluminum Parts
When searching for a qualified supplier of custom CNC aluminum parts, procurement professionals should look beyond basic pricing and evaluate the factory's quality management systems and technical capabilities:
· Inbound Material Inspection: Ensure the shop verifies raw material chemistry using spectrographic analysis. Low-grade aluminum alloys can contain high levels of impurities, leading to inconsistent machining and surface finish defects.
· In-Process Metrology: Look for facilities that perform in-process quality control, using tools such as Coordinate Measuring Machines [CMM], optical comparators, and air gauges to monitor critical dimensions throughout the production run.
· DFM Communication: A reliable partner will review your designs and provide constructive feedback prior to production, identifying potential manufacturing issues to save you time and money.

The Dazao Production Strategy: Resolving Engineering Risks Before Machining
At Xiamen Dazao Machinery, our focus is on providing reliable, high-quality manufacturing services by addressing potential engineering issues before production begins.
· Proactive Quality Planning: We conduct a thorough design and process review for every project, identifying potential stress-warping, tooling-access, or anodizing-offset challenges prior to machining.
· Certified Quality Management: Our production facilities operate under ISO9001:2015 and IATF16949:2016 quality management systems, ensuring consistent, traceable manufacturing for automotive, medical, and industrial applications. Sourcing managers can request our certified IATF16949 audit report and equipment specifications to complete their vendor verification.
· Transparent Engineering Partners: We provide comprehensive material certifications, inspection reports, and DFM recommendations to help you optimize your designs and keep your projects on schedule.

FAQs
01.How can I stop gummy 6061-T6 aluminum from welding to my carbide end mill?
02.Why do flat plate aluminum parts bow upward after pocketing on one side?
03.Why do bolts fail to thread into aluminum holes after hardcoat anodizing?
04.How do I eliminate high-frequency chatter when milling thin walls on aluminum?
05.How do I prevent galvanic corrosion when joining steel fasteners to aluminum parts?
06.Why does the anodizing color shade vary between different production batches?